Painting grout lines is a subject that keeps on coming up, almost as often as the other all-time favourite: what grout colour should I choose? It IS hard: you spend hours, days, sometimes even weeks or months working on a mosaic, and you get used to seeing it ungrouted. You choose all the colours and textures while seeing it ungrouted... and whatever grout colour you do choose, only one thing is absolutely certain... it is going to look different with grout. It can be a shock, sometimes even a disappointment, to see the grouted mosaic.
I personally consider that a mosaic needs to be grouted. There are mosaic methods that are designed to be without grout, and I respect that... but my own boring, old fashioned, conservative opinion is that the grout lines are an integral part of the mosaic, the mosaic is just not properly "finished" without grout. At the same time, it is true that grouting can sometimes pull a mosaic apart visually - and this is where colouring the grout lines comes in very handy. Painting grout lines is the easiest way to do this. (Another option is colouring the grout mix before applying it - maybe a subject for another tutorial someday?)

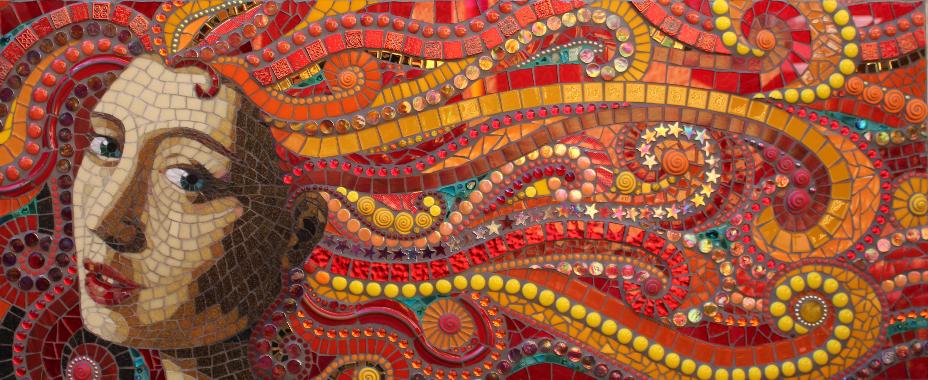
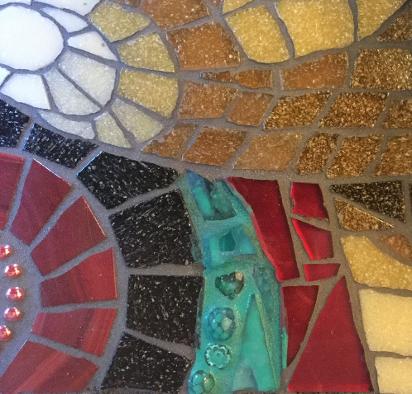
This is a detail of my Queen of Wands mosaic before grout. This is the moment when everyone says: do you HAVE to grout? It looks great just as it is! Yes, I do have to grout... There are gaps between the glass left specially for the grout, in real life you can see the ugly gray substrate shining through. It would be all too easy to catch on a corner of glass and pull it off, the lines on the side of her face are undefined, and the hair doesn't tie in with the face as I would like. The mosaic was designed with grout in mind and it shows.
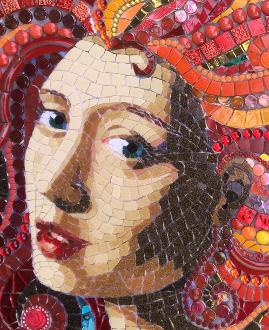
After grout... this is the moment when I look at it and think, OH NO, what have I done?!? I chose dark gray grout - if I had taken a lighter shade then the darker parts of her face would be fragmented. But quite honestly, if you saw this, without seeing the ungrouted version, you might think it's quite a cool portrait. Right? As it is, we can see that the dark grout has lost us all the fine shading and nuances in the face - and I want them back!
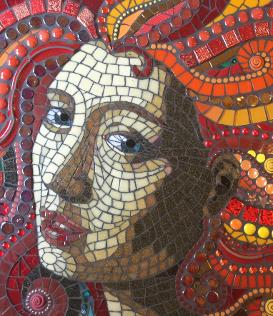
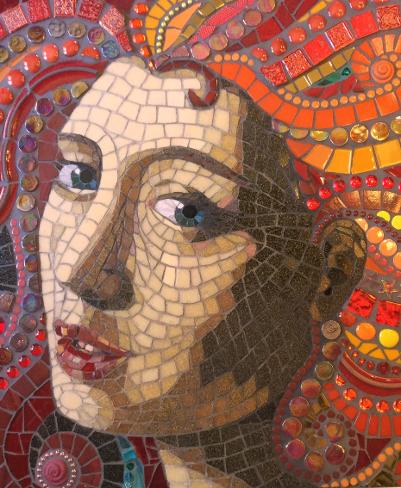
After several hours of painting and repainting the grout lines, this is the final version. Quite different, hey? This, to my eyes, is a finished mosaic, this is what I was aiming for. You can still see the grout lines, but they enhance rather than distract, and they also unify the two very different styles of mosaics I combined on this piece.
Read on, if you want to see how to make this kind oftransformation...
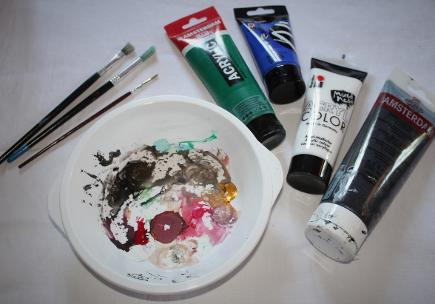
To start off, you will need your grouted and cured mosaic, a selection of high quality acrylic paints, a large white plate, several brushes, water, and a soft cloth.
Put a small blob of each of your desired paint colours on the plate - I always include black and white for shading - dab your bush into the water and then into two or three colours so as to mix a only a little bit of each colour at a time. That way you'll have a spot on the plate with, for instance, greeny-blue and a spot with bluey-green and you can lighten them or darken them as you like. Use one brush-full of paint on one grout area. The paint always needs to be slightly watered down, but the water from cleaning the brush is usually quite enough.
This is the area just below her chin. I want the green insets in her hair to glow a bit more, they fade into the gray grout too much at the moment. You just paint over everything with your chosen watered down colour, paint right over the the tess, the grout lines, everything. I find that a stiffer brush helps push the paint into the grout areas, specially if the mosaic is highly textured.
Wait for it to dry a bit, a minute or two is quite long enough, and then gently rub the paint off the glass with your soft cloth, leaving it just in the grout lines. If the colour is too light or too dark or not bright enough, go over it a second (third, fourth, fifth) time, until it is just right. Dampening the cloth helps cleaning off the paint.
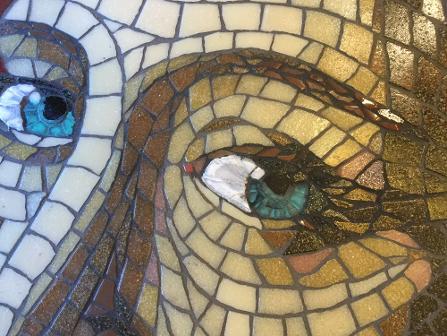
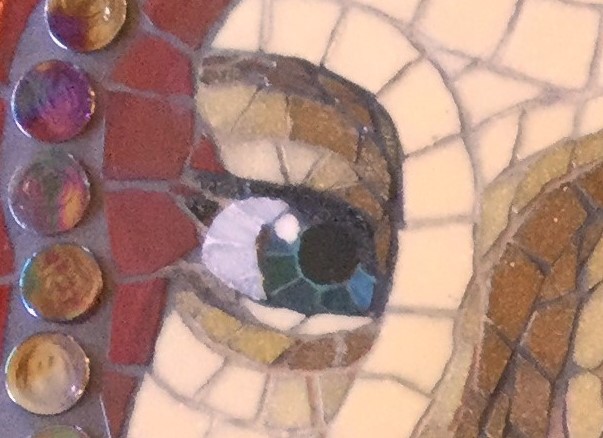
Here is the area around the eyes with a first layer of paint still drying. It really is very easy to do, and you needn't worry about getting anything wrong, because if you don't like something, you can just paint over it again. Take the area around the whites of the eyes for instance... I really wasn't sure how far I wanted the white to go out - does it need to include the outer grout line or not? Paint it one way, see if you like it, then if necessaryjust paint it right back again... and so on.
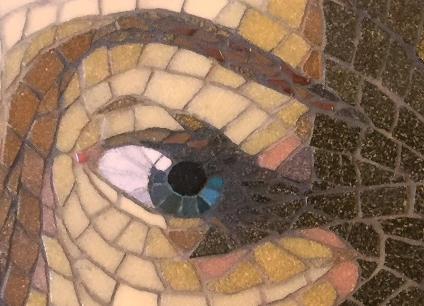
Now for some examples of fine tuning... I'm pretty pleased with how this is going so far, I have the basic colours for the different parts of the face, but I really want the eyelashes on the left eye to stand out a bit more. I could emphasise them with black, but the dark colours behind mean that it wouldn't show up much.
So I decided to highlight the lashes - and the outer edge of the eyebrow there, too.
The first layer is too light and makes it look as if the eyeball were running out over the lashes (ew!).
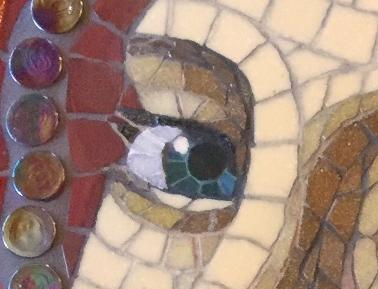
In the final version the eyelashes are subtly highlighted and more visible than before, but not so much that you're thinking "painted grout".
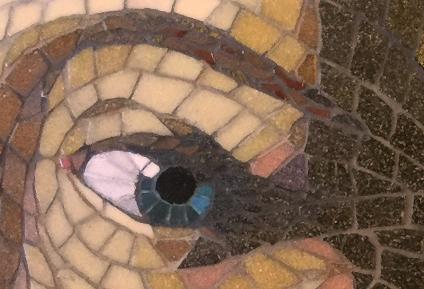
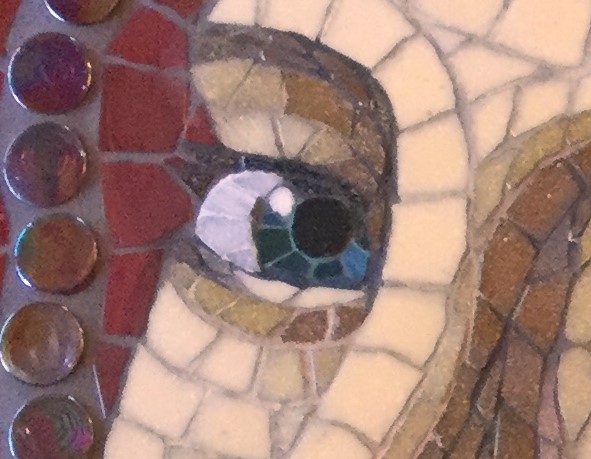
Here's another example for the other eye: I was unsure about the dark line along the lower eyelid. It certainly gives the eye definition, but looking at the ungrouted mosaic, I decided that I liked the more open look of a lighter edge.
So I lightened it and darkened it and lightened it again... and finally reached this compromise. The eye looks softer, but you still have the definition along the edge of the white.
The following two pictures show the first and the last painted versions of the mosaic. They are very similar at first glance, but you can see how the two details I showed do subtely change the way the mosaic looks.
So... can you spot any other differences? Go on, try to find some before scrolling down...
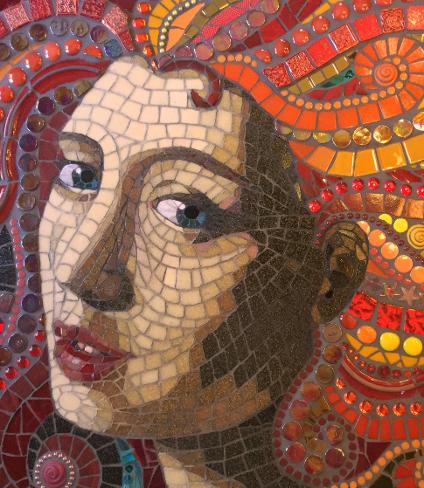
There are two other larger areas I worked on (beside many many tiny little details of course) one is the area behind her neck and under her ear: you can see that I darkened the grout well into her hair to bring the shading together better.
The other is a bit harder to see: it is the line below and along her lower lip, which was all one colour to begin with. Now it is lighter on the left side and slightly darker on the right. You can't really see it, but what you can see is that the line isn't so noticable anymore, her mouth is more part of her face.
So there you have it. Changes in the colour of the grout lines can have a large effect on the overall mosaic, so it's a skill that is well worth learning. You don't have to change the colour dramatically, small subtle changes are often all that's needed to bring a mosaic together.